|
This page contains information about many of the optional missions that are available in S.T.A.L.K.E.R.: Call of Pripyat. The list is sorted alphabetically - initially by the names of the persons giving out missions, and then by the actual mission names themselves (as they appear in the dialogue options). The list is currently not complete, but once I start to work on the walkthrough, they should eventually be added.
Please note that some missions might not be available right off the bat, ie. you may need to complete other missions first, or meet some other requirement. In most of these cases I've added notes to the mission description that should clarify what the prerequisites are, if any.
|
“Stalker! Quick, come help Petrukha! Look over there, at the edge of the crevice! He got whacked by an anomaly! Even his suit didn't help one bit! And me, I don't have one. Petrukha and I pooled all our money together to buy that one... If I take another step, I'm done for! Help us, please!!” | | At the Boiler Anomaly you'll come upon two stalkers - Awl and Petruha - scouting for artifacts. Being the one with the best protection against anomalies, Petruha is sent in. He's hit by a Boiler anomaly and lies severly wounded; Awl asks for your help. If you agree, he'll hand you a medkit. This is a very simple mission - just go over to Petruha and hand him the medkit you got from Awl. If you approach him directly from where Awl is standing, you should be safe from the Boilers. |
| | Awl refer to his friend as "Petrukha" while if you talk to him his name appears as "Petruha". In this guide, I'll refer to him as the latter. This mission is not a regular mission in the sense that it won't be shown in your PDA, and therefore has no official name. Please note that if you have a Echo Detector equipped when you complete this mission your reward will be a Bear Detector; if you already have that detector (or a better one), you'll be rewarded with a Fireball artifact instead. |
|
|
“How do you feel about earning some cash searching for artifacts?” | | You need to have completed Strange phenomenon for Beard before he'll give out requests for artifacts. While you still only earn money by bringing Beard these artifacts, you'll get almost double the amount than you would from selling them - so if you have any spare artifacts, fulfilling orders for Beard can be a lucrative affair. Below you can see which artifacts Beard will have orders for including the reward for fulfilling each one along with the regular selling price plus the additional money you'll earn from completing the order instead of selling the artifact. |
|
| Bubble | 18,000 RU | 9,600 RU | 8,400 RU | | Eye | 18,000 RU | 9,600 RU | 8,400 RU | | Firefly | 24,000 RU | 14,400 RU | 9,600 RU | | Flame | 24,000 RU | 14,400 RU | 9,600 RU | | Goldfish | 24,000 RU | 14,400 RU | 9,600 RU | | Gravi | 18,000 RU | 9,600 RU | 8,400 RU | | Shell | 18,000 RU | 9,600 RU | 8,400 RU | | Snowflake | 24,000 RU | 14,400 RU | 9,600 RU |
Beard will no longer give out orders for artifacts if you decide to complete Shady business for Sultan. |
|
“The artifact is the stuff of legends. They say the Compass has no harmful side effects and, if used, wisely, can lead you out of any anomaly. You can see why customers would line up to get their hands on it. Just the other day someone told me that Noah knows something about it. He's a stalker who lives south of here.” | | This is an extremely simple mission - vist Noah at the Old Barge and ask him about the Compass; he'll give it to you, free of charge. Return to Beard to complete the mission. |
| | You can pick up this mission during the Tempting business for Owl. Giving the Compass artifact to Beard is one of the prerequisites to earning the One of Ours achievement. You can actually return to Noah and ask him for a second Compass artifact. |
|
|
“Got a little something... Last night stalkers saw some kind of weird glow at the dredge station... Too weird even for these parts. Why don't you check it out? Make sure to watch yourself there. I'm warning you, that place is full of radiation. Don't forget your meds - you'll thank me later.” | | The strange glow is actually coming from an artifact, the Altered Wheel, that - as the name implies - used to be the wheel of the boat. Getting it is pretty simple, the main thing you have to worry about are the Springboard anomalies that surround the Dredge Station. However, once you have the artifact and leave the boat, a stalker called Tuna will approach you and ask if you got the artifact; you can try to lie to him, or just explain that you need the artifact for yourself, but he's not about to let you get away with it. If you refuse to give him the artifact, Tuna along with two of his friends will attack you once you try to leave the area. If you do give the artifact to him, they will leave you alone, but you can witness him running back to Beard and collect the reward himself - not a very satisfying solution. If you are doing this mission at the beginning of the game, it can be a bit tricky because Tuna and his friends are fairly well armed and you only have little room when they attack you. One option that may work is to give the artifact to Tuna, and then follow him and kill him on the way back to the Skadovsk. Another option is to stay inside the barge and attack the three stalkers before you even talk to Tuna; they will all spawn as soon as you pick up the artifact, and the cover from the cabin makes this an easier solution. |
|
|
“Something's just come up. The word is that some bandits are planning to buy a batch of weapons. Our boys want to follow them and spoil the transaction. We'd appreciate any help.” | | You're going to help some stalkers, lead by Spartacus, disrupt a weapons deal that is taking place at the Ranger Station. This is obviously going to involve some fighting, so prepare yourself accordingly. A good medium range weapon, some decent protection, and a good supply of ammunition, medkits and bandages is a good start. When you are ready, head over to the station and meet up with the stalkers outside; go talk to Spartacus and then follow the stalkers inside the compound. The deal is taking place just inside the building near the center, and there are about six bandits and probably five or so mercenaries.Following Spartacus into a small building nearby, you'll see a short cutscene which reveals that the bandits are looking to buy weapons and equipment in exchange for some artifacts. Once that is finished, Spartacus will tell you to move out - it's time to take them down. If you move out of the small building and to the east you can quickly see some of the bandits and get some shots off; you can also throw some grenades at them, just be careful later on as the stalkers have a tendency to enter the building, and you don't want them taking friendly fire.The "trader", wearing the exoskeleton, is the toughest foe by far, and he is usually the last man standing among the bandits and mercs - while he is your top priority, make sure you provide as much help to the stalkers as possible to avoid them taking any casualties. Once they're all dead make sure you loot the body of the "trader"; he's carrying a PDA that will prove valuable later on. Also, before you head off stop by Spartacus who will give you the first part of your reward: 2,500 RU and the location of a stash. Return to Beard to receive another 3,500 RU and complete the mission. |
| | You can pick up this mission from Beard if you decided to betray the bandits and help the stalkers during The hit. |
|
|
“Yeah, I came to Zaton with two of my buddies, Barge and Joker... Young kids, full of piss and vinegar! Itching to get their hands on mountains of artifacts, dying to be the first, the fastest... And I looked at those burning eyes and I said to myself, that ain't gonna do them no good. Loot's nice to have, sure, but it ain't worth charging headlong into a mutant's jaws. Well... We were hanging out one night, drinking, and started arguing over what to do next - should we go on or stay, and if we go, where to. Everyone's sticking to his guns, standing pat. Things got pretty heated and when the argument was over, we all went our own way, me included. I told them they ain't seen life yet... and some other unpleasant things. Man... If I only I could see them again, I would say I'm sorry for what I said then... We'd hang out together like before and remember the good ol' times...” | | To start this mission you need to give Cardan two bottles of vodka, which will get him to mention his two friends, Barge and Joker. What Cardan doesn't know is that, sadly, both of them are dead; you'll need to find their PDAs and bring them to him. Joker can be found south of the Oakpine Anomaly (look here) and Barge is in the underground caves south of the Burnt Farmstead (look here). While Jokers corpse should be fairly to find, Barges is a bit more tricky and dangerous since the underground is plagued by anomalies. Although Cardan wont give you anything for bringing him the PDAs, I guess you can consider the items you've found your reward. Discovering the fates of his two friends will encourage Cardan to sober up - something than will be mentioned during the final cutscene. |
|
|
Bring a bottle of Vodka to Cardan and he will you give you a 10% discount on all modifications and repairs for a limited period of time, and he'll also be able to provide a wider selection of modifications. Give him two bottles and he doubles the discount to 20%. Don't give him a third bottle as he'll just fall asleep.  |
|
“Yes, he told me about it too... As soon as Garry escaped he came here in fear of being pursued. Fortunately - both for him and for us - the mercs didn't track him... We're watching the place where the mercs and the client's people are supposed to meet, but it's all quiet... I'd love to know what the mercs are after here...” | | Before you talk to Kovalsky make sure you are carrying all the equipment that you need; once the mission starts you'll be transported directly to your destination and have no chance of changing or picking up different gear. You'll get a SVDm-2 on location, but you may prefer other weapons - ie. the Gauss Rifle is a powerful and precise weapon that can be quite useful here. Anyways, as you talk to Kovalsky you'll eventually have two options - eliminate the clients representative, which means that no one will go to the laboratory, at least for a while, or eliminate the head of the mercenaries, rendering their leadership defunct. Personally I just tend to pick off both targets, you know... just for the fun of it .
When you arrive, you'll be given the SVD sniper rifle along with 10 7.62x54 mm 7H1 rounds, which should be enough firepower and ammunition for your needs. You are located inside a room on the top floor of a building overlooking the Apartment Complex to the south - this is where the meeting will take place. You'll have to be a bit patient as it takes the first group of mercenaries a while to get there, and the second one arrives even later.Wait for both groups to arrive, and for the two leaders, Jackal and Serbin, to position themselves near the center of the yard. This is a perfect opportunity to take out both targets; there is no need to worry about the other mercenaries as they'll quickly evacuate the premises once their leaders are dead. If they do start to fire at you, make sure the leaders are down before taking cover - they will all try to slip away eventually and if either of the two leaders manage to do that you'll fail the mission. Once the two head mercenaries are dead, and the others have either left or been dealt with, go down the stairs and locate the body of Serbin, one of the mercenaries in a green scientist suit. He's carrying the Red X8 Keycard which can be used to open a locked door inside of X8, giving you access to a sizeable weapons depot. When you return to Kovalsky he'll tell you that you can keep the rifle and will give you an additional 30 7.62x54 mm 7H1 rounds, which I guess is a decent bonus. |
| | Once you've completed the mission that yields the broken Gauss Rifle you may be engaged in a conversation with Garry telling you that a group of mercenaries basically threatened him to show them the way to Pripyat; although he managed to get away, they are likely to be somewhere in the area. After this you can talk to Kovalsky to initiate the mission. I believe you may need to have completed either Mercenary camp for Owl or the mission offered by Yar, both of which will provide the required information about why the mercenaries have come to Pripyat. |
|
|
“Well, I signed up to do some work for the scientists, thinking it would be easy. What I failed to notice was that the contract only expires when all the work is done. The scientists promised to give me an official permit to be in the Zone at the end of it. I've completed every damn clause of the contract, except one little thing. I have to find all chemical artifacts in existence. Who could have known that you can't get Meat Chunks or Koloboks around here? If I could get those two, I would have headed towards Pripyat a long time ago, but I can't!” | | Simply bring Garry a Meat Chunk and a Kolobok, which will allow him to complete his contract with the scientists. Garry is going to be your guide in Pripyat and helping him out now will mean that he'll give you a Bubble artifact when you meet him in Pripyat. |
|
|
“I see, his gut feeling's still spot on. The thing is that we finally tracked the chimera down. Unfortunately, Crab is still down, and Danila's not back either... So it's just the three of us. But if Trapper chose you, you must be a fair hunter. Look, after a night of hunting, the chimera comes back to its lair at around three in the morning. By then it's out like a light. That's when we gotta pounce on it... When you're ready, come here at three AM and we'll make a go at it. We'll be at the bar.” | | Once you've talked to Trapper, stop by Gonta to pick up the mission. You can only start it during the night, around 3 AM, so go see him then. You'll automatically be transported to Izumrudnoye west of the Skadovsk along with both Gonta and Garmata. The Chimera is sleeping on the stage to the north. While it may be easiest to sneak up on it and kill it, you can go about it any way you like; lobbing a couple of grenades at it is a very viable approach. You must, however, at least damage the Chimera if you wish to get the reward from Gonta - he'll call you useless otherwise and will not give you anything; you can still pick up the money from Trapper, though. Once the beast is dead, talk to Gonta and you'll complete the mission. He then gives you the option to travel back with them to the Skadovsk, or decide to stick around; the former is a fast way to return to the Skadovsk. Remember to talk to Trapper when you're back at Yanov Station as he'll give you 2,000 RU for taking down the Chimera in Zaton. |
| | To pick up this mission you first need to talk to Trapper in Yanov Station; ask him about hunting, and he'll tell of you two chimeras that he's been tracking. One of them has left for Zaton and Gonta and his men are now pursuing it. |
|
|
“Dude, have you seen this Magpie guy? Know him?... No? Well, if you come across that scumbag, feel free to put a bullet in his head. Or you can tell me where he can be found and I'll make it worth your while. OK, he comes up to me once and says he can't get his loot out 'cause of a controller. My crew was one man short right then. Our pathfinder Danila went off to track bloodsuckers to their lair. So, we decided to help Magpie get his loot and took him hunting with us. All he had to do was keep a lookout for the chimera near the lair... What happened next was - the bastard ran away, taking his loot and pocketing ours, too. It was a hell of a surprise when the chimera finally showed up. Garmata, for one, had no time to react. I mean, who would?... Instead of hunting our game, I ended up defending my crew. In the end I wounded the chimera, but it managed to rip Crab a good one and made off. We lost a full week of preparation.” | | While many stalkers seem to know Magpie no one knows where he can be found - with the exception of Owl, but he wants 1,000 RU for the information; I'll tell you for free, so no need to spend any money . He is located at Yanov Station, going under the name Flint as a member of the Freedom faction. Head there and you can hear him boasting about how he killed a Controller and whatnot - it's actually quite funny to listen to. Anyways, talk to him and expose him as a liar - ask him about the bloodsuckers and the shortcut to Jupiter and you'll receive a new mission, False claims: deal with Flint.Now head to the large machinery at the Quarry; as you approach you'll notice an extra PDA showing up on your scanner and as you get closer you should see a dot on your mini-map. Head over there and you'll see a wounded stalker, Splinter. Talk to him and offer him help. He'll explain that he came to the Quarry along with a Freedom member looking for artifacts. They managed to find one, but after Splinter walked into a Gas Anomaly the other guy just took the artifact and left, leaving Splinter to die. Tell Splinter that you'll look for him; you'll get a new mission, Retribution: avenge Splinter. Shortly after you end you conversation with him, he'll sadly die. While you can loot his body, I tend to just leave him be and let the Zone claim him. Return to Yanov Station and go see Flint; you'll hear him talking about how he went to the Quarry the other day and found an artifact. Talk to him and hint that he was the guy who left Splinter to die. He'll tell you that you can't prove it, and no one will believe you over a member of Freedom. As you end your conversation with him he'll start to tell another story about him helping some guys hunting a Chimera. Listen to his story and the mission will be updated - Flint just revealed that he is Magpie. You now have several options; you can tell the Freedom commander, Loki, or you can tell the Duty commander, Shulga, about what Magpie has done. Either option will improve your status with the faction, and it is a requirement for getting either the Friend of Freedom or the Friend of Duty achievement. The final option is probably the most obvious one: tell Gonta that you've found Magpie; this is a requirement for the Man of Balance achievement. Once you tell either of them you'll complete the mission and receive the Courier of Justice achievement. |
| | To be able to expose Flint, I believe you must have either destroyed the Bloodsucker lair in Zaton, as part of the Find the missing hunter mission, or discovered the shortcut from Zaton to Jupiter (via the maps found on Stingray 2). You use information derived from these experiences to call him out as a liar, thus providing you with another lead in the mission. I haven't had a chance to confirm this fully, though. |
|
|
“Stalker, help get our buddy Mitay out of trouble, would you? Mitay is in real trouble... The bandits have started putting their foot down and demanding a cut of the artifacts stalkers find. We told them to take a hike, 'cause we figured stalkers don't owe nobody shit, and that seemed to be the end of it... But they ambushed the poor bastard when he went hunting for loot on his own and now they're demanding a ransom. Torba is suggesting giving them an artifact as ransom... I reckon we shouldn't give them shit. If we do, that means stalkers are working for the bandits... We should sell the artifact, hire us a solid crew and attack the bandit base.” | | You have a couple of options dealing with this mission. You can either agree with Torba, that a peaceful solution is the best and buy out Mitay. You can refuse to meet the ransom demand and try to free Mitay by force. Or you can decide to deal with the situation on your own. The first solution is probably the easiest and fastest, but it's going to cost you either an artifact or about 17-19,000 RU; you'll get a Goldfish from Grizzly to use as pay, but you when you talk to the bandit leader, Shishak, you can give him money instead (and keep the artifact for yourself); you can also give him a different, high-level artifact such as a Flame if you wish to neither part with money nor the Goldfish. On your way out, a bandit called Dwarf will stop you and demand more money; you must agree to pay him or all the bandits will attack you, and since you're basically surrounded by this time it's usually best to just give him the money. The amount appears to be random, I've payed as little as 2,200 RU, but other times about 4,000 RU. The second option means that you, along with a couple of other guys, will attack the bandit base at night. Obviously this is a risk since you or Mitay may die. If you're really looking for a fight with the bandits, why not complete the mission peacefully and then attack the base in your spare time? Just a thought. If you choose this option, you'll need to meet up with some hired goons at the car south-east of the Container Warehouse at about 1 AM. When you meet them, talk to the leader to begin the assault on the bandits. You also have the option to tell Grizzly you'll deal with the situation yourself which means you'll either have to pay the ransom or attack the bandits and free Mitay alone; in this case you'll receive a Goldfish and the stash locations as a reward if you get Mitay out alive. |
| | Completing this and the Debts mission without the use of force will earn you the Diplomat achievement. |
|
|
“Here's the deal. Several stalkers have gone missing. No one has heard anything about them, but just the other day they found one body. No signs of violence, but it was bled completely dry. Tremor searched the body, he could give you more details... Anyway, it's got to be bloodsuckers! I talked to Danila the hunter and he went off to search for their lair. Haven't seen hide nor hair of him since. You have to find the lair and hopefully track down Danila. The job ain't pretty, but I'll make it worth your while. OK?” | | Once you've picked up this mission, you can ask Tremor about the body that was found, but his conclusion is the same - a Bloodsucker must have done it. Anyways, your first stop is slightly east of the Oakpine Anomaly apparently since that was the last known location of Danila. Once you get there, however, all you find is a dead Bloodsucker; at this point, you'll get a transmission from Grouse telling you that he may have found the Bloodsucker lair and he asks you to meet him there. Next stop is the Krug Antenna Complex to the north.There you'll meet Grouse outside; follow him inside and deal with two Bloodsuckers. You then move into the basement, going through an elevator shaft. Eventually you'll make it to a small room with alot of sleeping bloodsuckers in it. Keep following Grouse, and try not to wake the bloodsuckers You'll come to a hole in the floor where Grouse will drop down - he'll ask you to tell Beard about the lair and that he'll meet up with you later. Head back to the Skadovsk and talk to Beard - he'll pose the idea of gassing the lair and ask you to go talk to Owl, who supposedly knows where to find some poisonous gas. Owl will demand 2,000 RU for the information, but there's no need to buy it from him - just go grab the required items from the Preobrazhensky Bridge: Key A, Key B and finally the Perin B3 gas from a locked box. Once you have the gas, make your way to the area just north-west of the Krug Antenna Complex. There you can hook up the gas to the ventilation system - do so by using the left then turn the valve on the right side. A timer will pop up indicating that it will take some time for the gas to have spread out; you will soon be joined by two bloodsuckers so either prepare for a fight or run away. Return to Beard for your reward; this completes the first part of the mission.Once you're back you may notice that Tremor is gone, and Grouse hasn't come back yet. Something is surely amiss! In fact, make your way up to the Dock Cranes, specifically the small building there. Inside you'll first come upon a dead stalker - search him and you'll see it is Danila the pathfinder, one of the missing stalkers that Grouse told you about; open the door next to him and you'll find Tremor inside along with the body of Grouse. When you talk to Tremor, you'll learn that it was him who has been the cause of the missing stalkers - with a growing hemoglobin addiction he needed fresh blood, and preying on wounded stalkers was one way to satisfy his hunger. Eventually he was exposed by Grouse so he killed him. He's not particularly proud of his doings, and after you've talked to him he'll sadly commit suicide; if you kill Tremor instead of letting him commit suicide, you'll find a PDA on his corpse. You can now report back to Beard and tell him that it wasn't bloodsuckers that were the culprits behind the missing stalkers, but actually the Skadovsk medic. You'll complete the mission, receive the second reward, and get the Detective achievement; the achievement comes with a nice perk - once a day, stalkers will put some medkits, bandages and/or antirads into your personal box on the Skadovsk. |
| | While you're inside the Bloodsucker lair, during the first part of the mission, you can choose to fight and kill all the Bloodsuckers ; while this may obviously prove slightly more dangerous, it does eliminate the need to acquire the gas from the Preobrazhensky Bridge, and I believe you can head directly to the Dock Cranes for the second part of the mission. Thanks to Edward Spencer for the tip!Once you've completed the mission, I believe the Owl will start to carry certain drugs and medical supplies seeing that Tremor won't be coming back. If you decided to gas the Bloodsuckers, the lair beneath the Krug Antenna Complex will be full of toxic fumes, and you'll constantly be drained of health while exposed - even if you're wearing an armor with a closed-cycle respiratory system. |
|
|
“You're not welcome here. This is our camp, and you've got no business prowling around it. My boys are too starved and high-strung as it is... Hah! 'Kay, you do that. Canned meat, sausage and bread... Six of each. Make sure you bring enough to go around, 'cause we're hungry as shit.” | | Simply bring Hatchet some cans of food, sausages and bread and you can freely access the Substation Workshops. It appears that the food you must bring him is random - although the dialogue indicates he'll need six of each, I belive he'll just need six in total; so this may mean two cans of food and four sausages or a different mix. I guess your best bet is simply to bring six of each to make sure you meet his specific requirement. |
|
|
“Hello. I'm Nimble. People come to me for unique weapons. Rare models, prototypes, unique shooters - stuff like that. Plus elite equipment, the latest modifications of protective and combat suits. I check every item personally, so quality is guaranteed.” | | Once you place an order for an item, Nimble will leave the Skadovsk to get the item you ordered; he'll be back in about 24 hours, so if you're anxious to get your item, visit the sleeping quarters and sleep for a full day - he should be back once you awake. The items he can acquire are divided into categories such as pistols and close-range weapons. The four first categories of items (see the list below) are random - ie. Nimble will get you one of the items listed, but you cannot be certain which one; you can always do a save before ordering and then simply reload the game if the item is not what you wanted; the three last categories, Armored suit, Suit with closed-cycle respiratory module and Exoskeleton will always result in the same item(s). All the items are unique in the sense that once you get an item, Nimble wont get that item again - this also means that once you have ordered a pistol three times, for example, he won't be able to deliver any more pistols; you will have received the Alpine, March and the Steppe Eagle by then. You can see the different order categories and items below. Each category has a fixed price and an amount you must pay in advance. The Item Price is the total cost (for one item) including the Advance. |
| Pistol | 3,500 RU | 700 RU | Alpine, March or Steppe Eagle | | Close-range weapon | 10,000 RU | 2,000 RU | Carabineer, Eliminator or Frasier | | Assault weapon | 20,000 RU | 4,000 RU | FT-200M, GP37 or Storm | | Sniper weapon | 20,000 RU | 4,000 RU | Lynx, SVU2-A or Tide | | Armored suit | 40,000 RU | 8,000 RU | CS-3a Body Armor and a Tactical Helmet | | Suit with closed-cycle respiratory module | 30,000 RU | 6,000 RU | SEVA Bodysuit | | Exoskeleton | 60,000 RU | 12,000 RU | Exoskeleton |
|
| Once you've bought your first weapon, you may start a new mission by going past Snag who claims the weapon is his. Refer to the mission description for more information.
- Strangely enough, the Eliminator that you get from Nimble has all the characteristics of a regular Eliminator, except that you can sell it for a higher price and it costs more to repair; the default selling price is 1,800 RU while Nimbles version sells for 4,200 RU. As far as I can tell, there are no differences between these versions except the price and cost of repair; perhaps the developers meant to add a special variant of the Eliminator, like some of the other unique weapons that Nimble can acquire.
- This order is only available once you get the storyline mission requiring you to obtain a suit with a closed-cycle respiratory system. |
|
|
“Right, finding materials to use for working with radio equipment is damn near impossible around here. I've used everything I could find and there's nobody supplying any materials here, because you can make more cash selling guns... I heard there could be something left at the cement factory, though... That would be great! If you find anything like colophonium or capacitors, bring them to me... hell, I would even be grateful for some textolite. I can't promise you lots of cash, but you'll get a discount, that's for sure.” | | Head off to the Cement Factory in the north-eastern part of Jupiter and go to the building to the north; around the back, you can find a ladder - your destination is the roof of the building, so head up. On the way you may spot an Electro anomaly, but you wont trigger it so no need worry about it. Once on the roof you'll notice a hatch and a hole; drop down to get inside the building. There is another electro down there, but it shouldn't trigger either. The building is full of small rooms so it's easy to feel a bit lost; refer to the video walkthrough in case you get stuck or miss a component somewhere. Take the stairs down. You'll enter a small hall - move down to the end and enter the small office; on a desk there you can find some copper wire (south-western corner). There is another doorway there, leading out behind a Burnt Fuzz anomaly; heading through there, you'll notice a hole in the floor. On the other side of the hole, on a shelf, you'll find a box of transistors. Now you need to drop down through the hole, but beware - there's a Burner anomaly waiting for you, so throw down a bolt first to see its exact location. Drop down and move into the room to the east - you'll find some textolite base on a wooden desk. Continue east and fine a can of colophonium on another desk; in the same room, up against the north wall, you'll find more textolite base on a metal shelf. Backtrack and go out into the main hall, on the same floor, and go west until you reach the stairs; head down to the second floor. You'll enter a room with some sort of pressure tank and pipes in it. In the north-eastern corner you'll find more copper wire on a desk. On the opposite side of the room you'll find a pack of capacitors on another desk. Grab them and locate the ladder going down in the south-eastern corner of the room. Take the ladder down and you'll come to a very similar room; on a desk on the southern side you'll find more textolite base. Close by is a small ante-chamber, in the south-western side of the room. Behind a burnt fuzz anomaly you can find another can of colophonium on a metal shelf. Once you pick it up, the mission should be updated - you have all the nine components for Nitro. Go to the stairwell in the north-western corner, head down and drop down to the ground floor and out the door. Make your way back to him to complete the mission. |
|
|
Just like Cardan, bringing tools to Nitro enables him to perform a wider selection of modifications to weapons and armor, and you'll also earn some money on the side. There are three sets of tools you can bring him: | | When you bring Nitro the final set of tools you'll earn the Hi-Tech Expert achievement. |
|
|
“I need information from the mercenary camp. It's not as hard as it sounds. Some kind of mercenaries appeared at the processing station and I'm dying to know what they're cooking... Sneak into their camp and dig up whatever information you can about their plans. PDAs, paper documents, bring me whatever you find. You got me? Go. It's nothing but kid stuff if you keep it quiet.” | | Your target is the Mercenary notebook located on the top floor of the Waste Processing Station. As Owl hints it is now a mercenary camp, and it is occupied by about 8 mercenaries. They're well equipped, wielding AKM's and TRs 301 rifles, and some of them wear exoskeleton armor. While Owl suggests a stealthy approach I personally tend to go in with guns blazing... well, technically I usually bring a silenced rifle and "blaze" the mercenaries quietly, from a good distance. It is quite viable to sneak in there; the easiest way is to go around to the back of the camp, on the nothern side, where you'll find a ladder going up to a large pipe with a hole in it; following the pipe you'll get right to the table with the Mercenary notebook on it. I've tried to sneak my way in a couple of times, but I tend to get spotted and when I do I'm in a bad place - so personally I find that taking out the mercenaries first is the most productive, also because you'll get some good loot out of it. If you decide to take down the mercenaries, make sure your equipment is up to par; as noted above, the mercenaries have got some good equipment and they can take you down with just a couple of shots if you're wearing a basic Sunrise Bodysuit or similar armor. It's doable, obviously, but you're easily turned into swiss cheese. A good place to approach the camp is from the north-eastern corner of the plant; there are some gaps in the walls where you can sneak in, and the slope going up to the main building can provide some needed cover. Once the mercenaries are aware of your presence they'll usually hang out on the walkways outside the building, as well as near the doors on the ground level. Staying in cover behind the slope and waiting for them to pop out is a good strategy. Once you've dealt with them be sure to loot their bodies; the two senior mercs, Hook and Ridge, not only carry TRs 301 assault rifles with various accesories, but also PDAs that you can sell to Owl; when ready, head upstairs to the second floor and find the table with the notebook. Bring it back and sell it to Owl to complete the mission. |
|
|
“A small job with the scientists. It's a piece of cake, really - fetch me this, bring me that... You've got to find three Veles detectors and bring them to the scientists' bunker near Jupiter. Once there talk to Novikov, he said he'd tinker with them... When detectors start to turn in a profit, we'll split it evenly. All clear? Then go. It's a piece of cake, really.” | | This mission requires you to find and deliver three Veles detectors to Novikov at the Scientists' Bunker. If you're at the earlier stages of the game, Veles Detectors aren't exactly common yet and coming up with three can be tricky. Here are some tips to getting your hands on them:The reward for the mission will be a better type of detector, so if you have a Veles yourself already, I guess you can just acquire another two and give them all to Novikov; however, he'll need to tinker with them and then the altered detectors must to be transported back to Owl which takes some time, so if you give up your own detector, you may need to replace it temporarily, possibly with a cheaper model. It takes about 30 hours (possibly more) from you drop off the detectors at Novikov until you get a message from Owl saying he needs to speak with you. I have experienced a few times that it seems to take forever, and sleeping for days doesn't progress the mission; travelling from Jupiter to Zaton, or vice versa, may give the mission the final push it needs before Owl will contact you. Returning and talking to Owl you'll learn that he has received the new detectors, but that he has also made an agreement with Beard about letting stalkers use the new detectors in exchange for a cut of the profits they make off artifacts. However, he feels Beard doesn't live up to the agreement, and asks you to go talk to him. Beard has a different understanding of the situation, saying he very specifically lives up to the agreement; he's bought two detectors and has paid Owl for them - but he's not buying the third one, so he gives it to you - you get the Svarog detector prototype. Head back to Owl who will have a proposition for you; you can turn him down and get a cut of his profits - 1,500 RU - which will complete the mission. However, if you wish to help him out, go talk to Sultan. Tell him that Beard owes you money and it'll lead to the mission Shady business. Be sure to check out the details of the mission before you pick it up since it has consequences for your relationship with Beard. |
| | You can only pick up this mission once you've done The hit and the follow-up mission, Transaction. |
|
|
“Listen, there's some urgent business. A trader I know wants to swing a deal. Only problem is, his customers are the bothersome type, so he's hiring a security guard just in case. You interested?” | | You are to meet the trader, Morgan, inside the central building at the Ranger Station. He's got two mercenaries with him providing some backup. Now, this mission can be quite tricky - not only because you'll be going up against five or six bandits and about five stalkers, but you'll need to keep Morgan, and yourself obviously, alive as well. Prepare for a tough fight. Head off to the Ranger Station and go talk to Morgan inside the large building. You'll move into the small room nearby and eventaully about six bandits will show up. Go stand next to Morgan and you'll see a short cutscene where the deal is initiated and eventually interrupted by a number of stalkers sneaking up on you. At this point the bandits will go hostile and a firefight ensues. Now starts the tricky part as you'll be directly faced with the bandits, and stalkers are closing in on you from behind - you are, in other words, pretty much caught in a crossfire, and keeping Morgan - let alone yourself - alive can be a frustrating affair. Morgan is wearing an Exoskeleton which gives him good protection, but he is not invincible and he will go down if you don't take out the enemies fast enough. Sadly, the two mercenaries that Morgan brought are probably not going to be of much use - at least for me they tend to be full of lead before the fight has even properly started. While the bandits seem like the most obvious threat, I believe that the stalkers are actually your main concern; quickly deal with the bandits and put your focus on the stalkers.Once the fight is over, and Morgan hopefully has survived, go talk to him to receive your reward and complete the mission. As you may know, Morgan is carrying a PDA containing some valuable information, and getting your hands on it is part of a partial requirement for three mutually exclusive achievements; once this mission is complete, Morgan will travel to and stay inside Yanov Station, so this is your last chance to get it from him - and the only way to do that is by force. Although Morgan is part of the Duty faction, I don't believe there is any negative consequence for eliminating him. |
| | You can get this mission from Owl if you stayed out of the firefight during The hit, with the stalkers managing to get out on top. |
|
|
“Our scanners registered unusual activity north of here... Judging by the received data, I expect that the anomalous formation there is unstable. Unfortunately, I can't say any more than that from here. We need to conduct research in the field... The only thing I can say is that regular stalker detectors won't be able to detect the anomaly - you'll need a Svarog, one of our own inventions.” | | This is another very simple, but kind of cool mission. Once you have the prototype detector you can investigate the anomaly that Hermann is talking about. Head out of the bunker and make your way towards the Cooling Tower with the detector in hand; as you approach you'll see a large "bubble" up in the air. Move close and it'll eventually begin to surge at which point you'll complete the mission - strangely enough. Five bodies will drop out of it and fall to the ground along with some equipment - including some weapons that appear in mint condition; search the bodies and on General Tachenko you should find a PDA - you'll be given a new mission, Duty history, which basically requires you to find the right person to give the PDA to. You have three choices, and they each fulfill a partial requirement for three mutually exclusive achievements: Friend of Duty, Friend of Freedom and Man of Balance. |
| | Although you can pick up this mission once you've completed Anomaly research, part 1 you'll need to have the prototype detector, the Svarog, to complete it. This detector is acquired during Tempting business, a mission done for Owl. If you've done the two Anomaly research missions for Hermann prior to this one, you'll receive the Research Assistant achievement upon completion of this mission. |
|
|
“Please wait... Would you be so kind as to give me a moment's attention? Recent events have made it very clear that our research team is not sufficiently prepared to conduct proper field work. You, on the other hand, managed to deal with the controller on your own! That is quite astounding! My point is that it would be only logical for us to at least attempt to recruit such a capable expert as you. Our science group is most positively in need of your assistance. We need to take measurements, position scanners... I am trying to find the correlation between emissions and the appearance of artifacts in anomalies. I have a theory that the next emission can be forecast using the number and quality of artifacts that appear. In order to make specific calculations, I will need to gather statistics. All we need to do is position a few scanners in the middle of anomalies of different types. Excellent! You need to get the scanners from Novikov and position them in the anomalies on your PDA. When you're done, come back to see me - I have another matter that concerns scanners and measurements to discuss with you.” | | This mission requires you to place three scanners in three different anomaly fields - these include the Bitumen Anomaly, the Concrete Bath Anomaly and the Electro anomalies at the Parking Lot. Pick up the scanners from Novikov and head off to the first anomaly of choice. This mission is pretty simple - the main problem is probably going to be the Bitumen Anomaly and the Electro anomalies at the Parking Lot since you physically have to go inside the anomalies to place the scanners; for the Concrete Bath Anomaly you simply place the scanner at the edge of the basin and don't come into contact with the anomaly itself. The Bitumen Anomaly has extreme heat emissions and alot of both Burner and Vortex anomalies inside - bring a good suit and some artifacts that provide thermal protection. For the Parking Lot, needless to say bringing some artifacts that protect you against electricity is going to be helpful. While you are at the three anomalies be sure to check for artifacts - while you put yourself at risk, you might as well get something out of it. |
| | Once you complete the mission you can hover your mouse over one of the three anomalies on the map in your PDA and it will reveal which artifacts are present. |
|
|
“The scanners in anomalies are transmitting information. All we have to do is wait for the results. You can place a few more scanners in anomalies if you want. We could always use extra information and as your reward, we'll inform you when artifacts appear in anomalies.” | | This mission has you place an additional two scanners in anomalies, this time the Ash Heap Anomaly and the Plavni Anomaly. The latter is pretty simple since you'll need to place the scanner at the edge of the anomaly and thus won't have to get in harms way. The first one, though, needs to be placed near the center of the anomaly, which has strong heat emissions and is filled with Burner anomalies; needless to say, bringing an artifact providing thermal protection is a good idea. Once you have placed both scanners you'll complete the mission - ie. there is no immediate need to return to Hermann. |
| | Completing this missions allows you to see if there are any artifacts located at the Ash Heap Anomaly and the Plavni Anomaly. |
|
|
“You're really willing to assist us in carrying out a full external scan? I knew that the desire to advance science and do good in the world would triumph inside you in the end! All right, here is the plan. A stalker research group will take the measurements. Your job is to escort them, that is to protect them and guide them through difficult terrain. Good luck. The stalkers are waiting for you outside.” | | This mission has you guard the stalkers while they take measurements at two different locations - the Plavni Anomaly and at the Ash Heap Anomaly. You may wish to bring a couple of weapons with you - both a short-range and long-range weapon should serve you well. Talk to Topol when you're ready to leave - you can choose which location to go to first but it doesn't matter; I personally tend to pick the first one myself. When you're at a location it'll take the stalkers a couple of minutes to finish the readings - during that time you'll come under attack from various threats.At the Plavni Anomaly you'll be charged by groups of mutants, Boar and Flesh mainly, about four or five creatures at a time over a total of about four waves. Be sure to look around when it's quiet, the mutants may come from different sides. Once the stalkers are done with the measurements, go talk to Topol; you have the opportunity for a break back at the Scientists' Bunker in case you're running low on ammunition or other equipment, otherwise head straight to the next location. At the Ash Heap Anomaly you'll be fending off zombies - what's worse, when you arrive there the game has a nasty tendency of spawning large group of zombies right next to you. It's easy to lose one of the stalkers here, but it is possible to survive if you're fast enough - also, the stalkers are pretty tough, and they defend themselves pretty well. Once they start taking measurements watch out for zombies coming from Kopachy; they tend to come through the house or from the right side (western side of the village). Pick them off from a distance to avoid them getting any shots in at the stalkers. Once the stalkers are finished, talk to Topol to head back to the bunker. Talk to Hermann to complete the mission and receive your reward. |
| | Once you complete the mission, and if Topol and his team has survived both missions they've participated in, they will fully join the Scientists faction and have a major upgrade of their equipment. Be sure to talk to Topol after the mission - he'll show his gratitude for your help by giving you a number of items: three scientific medkits, five antirads, two psy-block, two antidotes, two radioprotectant, an anabiotics and a screen helmet. |
|
|
Once you've picked up the Administrative Documents from the Jupiter Plant you'll be attacked by mercenaries; these are the mercs that were guarding the Scientists' Bunker, and now that they're gone, the bunker is no longer guarded. You can then pick up a mission from Hermann requiring you to find replacements. | | While it may be obvious to ask either Shulga or Loki to have either Duty or Freedom guard the bunker, there are other people you can ask. Asking Beard for advice, he'll tell you that his men, lead by Spartacus, might be a good choice, since some of them were security guards - some even special forces - before they came to the Zone; Spartacus won't be available until after The Hit, and quite possibly the follow-up mission Transaction, though, if he manages to survive. Topol can also be asked, but he'll refuse due to the fact that they're already employed by the scientists, and he doesn't think his group be up for the task anyway; however, his men will also recommend Spartacus and his friends. You can also ask Hatchet, a mercenary located along with his crew at the Substation Workshops; however, you'll need to bring them food first. |
| I have previously stated that getting either Duty or Freedom to guard the bunker was a requirement for the mutually exclusive Friend of Duty and Friend of Freedom achievements. This is not true and I apologize. Thanks to Tejas Stalker for correcting me  . . |
|
|
“We're trying to collect a new type of samples at the moment. They don't have any anomalous effect on their own, but experiments we conduct with them produce incredible results! Our research team, made up of local stalkers, recently found a psy-field that is highly unusual. According to our theories and the measurements taken, the nature of this field is such that it has intermittent psy effects, as opposed to emitting them permanently. OK... The stalkers who found the psy-field believe that it contains a mutant lair. I don't really believe them... I mean, no mutant other than a controller can survive in an intermittent psy-field! Don't worry, our boys will deal with the mutants. We need you simply because regular contact with psy-fields has reduced our stalkers' resistance to their effects. Exactly! This mission is essential for science in general and for our team in particular. Your help would be invaluable. If you have any doubts, go see Ozersky. He will conduct the necessary analysis, which will identify your current resistance to psy-emissions. You can also ask our stalkers and they'll explain it all to you. So, are you willing to aid science?” | | Although Hermann tells you see Ozersky, there's not much he can really do; through a simple test he'll make sure you are capable of resisting the psy-emissions, but since Hermann has given you the mission in the first place, you're up for the job. Head out of the bunker and go talk to Topol, he and his team are going to help you fight any mutants there might be. The psy-emissions you are going to be exposed to are pretty intense, so make sure you bring some medkits, some psy-block drugs if you have them, and you're also going to be dodging some Electro anomalies which means that protection against them can prove useful as well. Finally, a powerful, long-range weapon will serve you well. When you are ready, let Topol know and you'll automatically be transported to your destination: the tunnel in the far north-western corner of Jupiter.Head inside the tunnel, and be on the lookout for zombies - there are about three or four about so be sure to kill them before you investigate the emissions further. Once they're all down you'll get a short transmission from Topol, so you'll know it's safe at that point. Locate the hole in the fence on the southern side and move west; as you approach, you should spot a moving blue "cloud" - it's a Tesla anomaly. Move forward to the corner, avoiding the Burnt Fuzz along the way. Take a moment to watch the path the Tesla is following. You need to move around the corner to the left and then quickly take a left again into an adjacent room - so watch the floating anomaly to see when the path is clear. Make sure you also keep an eye on your health, as the psy-emissions are likely to drain it constantly.Moving around the corner and into the adjacent room you'll see some shelves and more Electro anomalies. There is somme ammunition on the group and on one of the shelves here. Keep moving and you'll eventually come to a small room clear of anomalies, with your objective sitting on the ground: the Altered Insulator; this artifact is causing the psy-emissions and picking it up will end the bombardment. There are some more items in this room, including some food and an AKM-74/2U, so pick up everything you need not forgetting the artifact. Before you head out the door to the north, prepare yourself for a fight - a Controller is up ahead.Move out of the room and quickly move into to the tunnel and look towards the exit - as you do, you'll probably hear Topol and his men warn you about a Controller as they grab their heads, overwhelmed by its influence. Time is of the essence at this point - you must kill the controller pretty fast, otherwise Topol and his men will come under it's influence and start to attack you. If you kill it, Topol and his crew will recover and make it out of there alive, even if the Controller managed to get them under its influence - so you can still save them, even if they go hostile. The Controller is initially located back at the train car near the entrance - so a good, long-range weapon is definately useful here. Keep hammering the Controller with everything you got, making sure it goes down before Topol et al does. Once it's dead, give Topol and his men a minute to recover, then talk to him. He'll thank you by giving you the location of a stash. Head back to Hermann to complete the mission. He'll be surprised to hear there actually was a Controller there, but very thrilled that you all made it out of there alive - given of course, that you did. If Topol and/or some of his men doesn't make it back, they'll be replaced by random guys for the next missions. As you end the conversation with Hermann he may address you again right after, asking for your help in a different matter. If you accept his offer this will kick off the Anomaly research, part 1 mission. |
| | You need a decent protection against Psy-emissions before Professor Hermann will offer this mission - wearing something like a Tactical Helmet should do the trick. |
|
|
“An area filled with a previously unknown anomalous plant has appeared near the edge of the quarry. I really want a sample of this plant, but stalkers refuse to go near the place. If I had one of those plants, I could speak to Hermann about rewarding you with one of the spare suits.” | | This is a very simple "fetch" mission, requiring you to visit the Anomalous Grove south-east of Yanov Station. The area is filled with Gas anomalies and chemical vapours, so bring a suit with decent protection and/or wear a couple of Meat Chunk artifacts. Having the Svarog Detector will also be quite helpful to avoid stepping in one or more anomalies. When you have the flower, return to Ozersky who will now be more than happy to help Sokolov out with a suit. |
| | You can pick up this mission once you're trying to assemble a team to go through the Pripyat Underpass. Sokolov needs a proper suit, and to help him out you'll need to complete this mission for Ozersky first. |
|
|
“I have two theories about that. The first is that mutant aggression may be caused by the intrusion of several people into their territory, in which case that is normal behaviour for most unmutated species, including humans. The other theory is that mutants are somehow capable of receiving the active emissions of our measurement devices. Clearly, the latter theory is far more intruiging. The measurement device should be activated in an area where was no previous mutant activity. Furthermore, in order to minimize the human intrusion effect, the experiment should be conducted by a maximum of one person.” | | You can pick up this mission once you've completed Anomaly research, part 3 - ask Ozersky about protecting the stalkers and agressive mutants and he'll tell you about his theory. The mission requires you to go to the Bitumen Anomaly and place a scanner inside; as you know, the heat emissions are pretty strong so be sure bring some applicable artifacts or wear a decent suit. Once you've been issued the scanner, head over to the anomaly and make your way inside to the point marked on your mini-map. Once you place it, make it out again fast - about 8 or so snorks are going to be joining you real soon, and you don't want to fight them while being inside the anomalous area. After you have placed the scanner you need to wait for it to collect the required data - this takes a couple of minutes, so dealing with the snorks in the meantime is a good idea especially since you also have to pick up the scanner again. When the scanner is done, grab it and head back to Ozersky and tell him about the results - the measurements done by their equipment does attract mutants! He'll give you the 3,000 RU as a reward and you'll complete the mission. |
|
|
“Thank you - we already have a stalker squad working for us. Although... there is a theory, in fact it's more of a legend... Have you ever heard of the Oasis? Then listen. Many people talk about it but it seems that nobody has ever seen it. It's like healing waters. If you walk in, your wounds heal and your energy is replenished. There are many rumors making the rounds, one more incredible than the next... Some claim to have seen it in their dreams... but as a scientist I am obliged to ask, "How do you know it really was the Oasis?" If you agree to look for it... Well, I can't promise you a massive fee, but if the Oasis exists, its discovery would help us make a giant stride in our research.” | | You can ask alot of people about the Oasis, but it's hard to gather any really tangible information. Some claim the Oasis is located at "the center of the Zone" while others merely note that everyone has their own idea about the location, and the only thing in common about those locations is how hard they are to reach; some even say it's located in Pripyat, right under the ferris wheel. As you can hear, many think the Oasis is real - others simply dismiss it completely as a mere fairytale. Well, that's about to change.Make your way towards the railroad west of the Ventilation Complex in Jupiter - you'll find a small building there, right up against a concrete wall, directly east of the swamp. Refer to the screenshot on the right, or the interactive map, for the exact location. This is the entrance you're looking for - well, it's not like you enter the door and... hey, the Oasis! It's the first step, so to speak. As you arrive you may notice a number of PDAs in the vicinity - they're zombies, so once you enter the building be ready to deal with them. There are also plenty of hamsters around, but they should be less of a problem as long as you don't let them group up on you.Moving through the building you'll eventually come to a couple of rooms with large pipes going up - you can climb into these pipes and up into the next set of rooms; more pipes will follow, but the next two have a ladder inside of them. At first glance the place may seem like a maze with rooms and pipes, but the only way you can go is either forward (towards the Oasis) or back towards the way you came.Eventually you'll come to a room full of pillars - this is actually one of the reasons why the Oasis has become such a legend or mystery - the room has an anomaly in it, a kind of puzzle that you need to solve to go any further. If you just run through the room you'll eventually find yourself back where you started, ie. it seems like you just go in circles. If you look at the screenshot on the left you can see that there are several rows of pillars - the first row has four pillars closest to you; behind that is another row, then another, etc. further away from you. - a total of four such rows. As you'll notice, with four pillars per row, and a wall on both sides of the outermost pillars, you get a total of five ways you can move past a row. To solve the puzzle you must find the right path for each row, and eventually take all four right paths to reach the Oasis. When you move through the room and end back where you started, you may see some shimmering lights fall down from some of the ways - this is an indication of a correct path. When you have found a shimmering light in each row you've also found the right path. Run through these lights in each row and you'll reach the Oasis. You can't ruin or break the puzzle, so run through the room as many times as needed until you've found the way. Refer to the video on the right to see a simple way of solving it, in case my explanantion makes little or no sense to you. Please note that the puzzle may have a different correct path from game to game, so the path I take in the video may very well be different from the one you'll have to take.Once you've solved the puzzle and move on you'll reach the Oasis: a small gathering of bushes, trees and water inside some sort of silo at the Ventilation Complex. You'll find what you're looking for here; the Heart of the Oasis is an artifact hanging off a tree in the center. Before you pick it up, look around - directly opposite the artifact you should see a ladder - this is the easiest and fastest way out. When you pick up the artifact, a couple of mature Pseudodogs will come charging into the room, so be ready for a fight - or to scramble for the ladder. I'll leave the choice up to you. Once you have the artifact, get out and head back to Ozersky to complete the mission. |
| | After you've solved the puzzle it will be deactivated, and you won't have to solve it again if you should ever wish to visit the Oasis again. |
|
|
This isn't a mission you pick up like the others. Once you've bought your first weapon from Nimble, Snag may engage you in converation as you run by him; I believe you need to have the weapon in one of the two weapon slots in your inventory before Snag will begin the conversation. He'll claim that the weapon is in fact his and he wants it back. You can give the weapon to him, but that's not really a compelling choice; there is something sneaky about Snag and there's no reason to think the weapon really is his. | | Once you've talked to Snag and kindly, but firmly, denied his request, you can go talk to Nimble and say that the weapon you got was stolen; Nimble will tell you that he doesn't deal in stolen goods. As you mention that it was Snag who claimed it was his weapon, Nimble tells you that Snag has a reputation for being a crook, and that he has scammed other people before. At this point you'll actually start the mission - go talk to Snag. You'll see that he has disappeared and the mission will be updated, you need to find out where he went. Head over to Beard - he'll inform you that Snag was seen leaving the Skadovsk, and that he overheard a conversation about the Dock Cranes. So, head towards the Dock Cranes, but before you leave the Skadovsk be sure you are prepared for a fight - you're going up against 4-5 bandits, initially at close range.As you reach the Cranes you can see the aforementioned bandits, but they are not hostile. Go talk to their leader, and he'll ask you if you're Snags friend. No matter what you answer, he demands your "loot", which actually means a good amount of your money (about 35-40%) and some of your weapons - you can get your weapons back, but not the money; in any case you probably aren't going down that path as it's neither satisfying nor profitable. The other option is to turn him down which means that the bandits will become hostile. Kill them and be sure to loot the body of the leader, he's got a PDA on him. It appears that Sultan is looking for Snag as well; sadly, you cannot talk to Sultan about it and none of the bandits on the Skadovsk will mention anything about Snag as far as I know. Now it's time to head to Yanov Station in Jupiter. At the station you may run into Snag - he'll deny that he's been deceitful and claim that Nimble is "messed up in the head". To progress the mission from this point you need to either sleep or take a trip to another area like Zaton; once you do (and return to Yanov Station if you went to a different area) go look in your personal box - it's empty! You'll receive a new mission, Theft, that is connected to this one - you need to find out who stole you loot and where it is. Go ask around in Yanov Station about your missing stuff - not many seem to know anything, not even Trapper who appears to spend all his time in the basement, close to your personal box. Eventually you may run into someone (possibly Bonesetter) who saw a suspicious person leaving the station; if you ask further, he'll say the person went north-east and that perhaps Zulu saw him. If you haven't visited him yet, Zulu is the guy living in a tower slightly north-east of Yanov Station. Pay him a visit and he'll tell you that a couple of guys had an argument near the tower; tired of their loud bickering, Zulu scared them off and they headed towards the Substation... so that's you next destination. Arriving at the station you may hear someone talking - head over to the small building on the eastern side; inside you'll find a bandit standing over a wounded Snag. This is a messenger sent by Sultan; if you get close enough, he'll ask you what you want - give him the more polite "just passing by" answer or he'll attack you. What you do from here I'll leave up to you - you can help Snag out with a medkit and he'll tell you about the location of your items. You can also kill him and loot his PDA off his body to discover where your items are. You can also kill the bandit or let him go, I'll let you decide. As for your items, they're hidden down in a small underground room behind the Substation.If you're like me, you'll now have to haul hundreds of kilos worth of stuff back to Yanov Station... as I say, you never know when 227 bottles of vodka are going to come in hand - well, I feel the punishment for that at this point. Anyways, you may find a few extra items among your own stuff - last time I played there was a Berill-5M Armored Suit that I didn't have before... I guess you can consider these extra items the reward for completing the mission. |
|
|
“You see, I hid some loot in this old Zaporozhets car. But then an earthquake hit and the car fell underground. I checked it out and the car seems to be within reach... Only, umm, there's mutants there, you know, snorks. Believe it or not, I ain't even scared of controllers, but those damn snorks are just too creepy and disgusting for me. If you get a hold of the container with a security lock, we'll split the loot fair and square.” | | The loot is inside a steel box hidden away in a car at the bottom of a ravine right next to the Fuelling Station. Getting there shouldn't prove too difficult; there are various ledges in the ravine that you can use to jump down towards the bottom and reach it unscathed. Watch out for Snorks on your way out. When you return to the Skadovsk with the box, you can either talk to Snag and split the loot with him, or visit Cardan and ask him to open the box; the latter will cost you 500 RU (no discounts even if you bring him vodka), but you'll have all the loot to yourself; I am not aware of any negative effects of doing this - Snag doesn't comment on the fact that you never brought back his box; perhaps it comes with a small reputation hit among lone stalkers. The box contains: |
|
|
“Well... We dont' remember how we got here. I remember that we were a Monolith squad... We had this burning desire to reach the center of the Zone. That's where the Monolith is - it's a meteor, that brought the beginnings of new life from other planets... I remember reaching the CNPP together... And then it's all fragmented. I remember a bright light... cosmic cold... and a clear voice... Everything was just... perfect. I don't remember what that voice ordered me to do now. Several years of my life... just gone. The boys are the same... We don't know what to do. We definately need somewhere to take cover from emissions... and mutants, right? Do you have any ideas about where we would be safe?” | | A bit north of the Container Warehouse you'll come upon a squad of former Monolith members who are currently stranded with nowhere to go. Their leader, Strider, will call you over when you get close enough, and he asks that you help them find a place to stay. Obviously, the only suitable place nearby is Yanov Station, but it's not likely that the residents there will look kindly upon a squad in Monolith outfits just wandering in. As far as I know you have two options - persuade either Shulga of the Duty faction, or Loki of the Freedom faction, to allow Strider and his group to join their respective faction. This will not only give Strider and his group some new allies, but just as important they will get new outfits matching those of their new faction. The faction commander will need to trust you enough first, before they are allowed to join one of the two factions. This can be obtained by eg. finishing the mission In search of Magpie by telling the commander about Magpie; you can also give him some of the more important intelligence items, such as Morgan's PDA or General Tachenko's PDA, to gain his trust. Once the commander of your choice trusts you enough, you can talk to him and say you're ready to lead a group to the former Monolith. You'll automatically be transported back to the Monolith camp where you'll witness the initiation ritual which is quite different depending on which faction you've chosen. Duty demands a strict discipline and depends on a strict hierarchy, whereas Freedom has a more casual and relaxed attitude. Once the ritual is over you can talk to either the faction representative or Strider for an automatic trip back to Yanov Station. Once there you can find Strider outside Lokis office if they joined Freedom, or in the room next to Nitro if they joined Duty. |
| | Getting Strider and his group accepted into one of the factions is a requirement for the mutually exclusive Friend of Duty and Friend of Freedom achievements. |
|
|
“I guess I can... Here's my thinking: we drive Beard broke and take over his setup, you get your money and a cut of the business. Deal? Now your job's to find out what's keeping Beard busy right now. Cutting off his supply channels will do the trick.” | | At this point Beard should have mentioned an order for a special artifact, the Compass; tell Sultan about it and you'll be tasked with finding the artifact; Noah, a stalker living on an old boat nearby, should know where to find it. Head to the Old Barge south of the Skadovsk. Be careful when you open the door to the barge as Noah appears to be a very nervous type, loading off two rounds from his SPSA whenever someone comes knocking. Head inside and talk to him; strangely enough he has the artifact and gives it to you without any discussion. That Noah is strange but nice fella! Return to the Skadovsk and give the artifact to Sultan. He'll give you 10,000 RU in return and tell you that Beard has issued the new detectors, the Svarogs, to some stalkers and that you'll need to get your hands on them.Go talk to Beard and pick up and order for an artifact; the mission will be updated and you can now locate the stalkers. There are two groups consisting of three men each; they will be marked on your mini-map so locating them shouldn't be a problem. The first group, lead by Sledgehammer, is heading to the Claw Anomaly, and the second group, lead by Crest, starts out near the Scar Anomaly. You can get the detectors in several ways; killing the stalkers and looting their corpses is one option, but as mentioned each group is three man strong and they carry some decent equipment, so you may prefer a peaceful solution: talking to them and convincing them to hand over the detectors. Sledgehammer will only part with his detector if you bring him a new rifle - I haven't tried that many, but he did accept a Vintar BC. You can tell Crest that you killed the other group and he'll hand over his detector without further incident. Once you have both of them, return to Sultan and finally go talk to Beard. You'll complete the mission and the artifact order will be cancelled. |
| | You can pick up this mission from Sultan if you decide not to demand a cut from Owl during Tempting business, instead helping him out. Be sure not to complete the Compass mission for Beard as you'll eventually fail this one after Sultan discovers that you helped him out. Completing this mission will mean that you can pick up a cut of Beards profits once a day; however he'll no longer be giving you any orders for artifacts. |
|
|
“The money-making kind. Now think: why am I asking you? You're the new guy with no connections to speak of but if you play your cards right you could quickly gain the locals' respect. Wanna know what I'm thinking? All right, then listen up. We got a mind to shake down a few of Beard's stalkers. It's a real cinch. Late at night, you and our guys come up to the Shevchenko, and before these tourists figure out what's going down, you take 'em for a ride. We get the dough, you get the props... Catch my drift? Alrighty then. See Knuckles standing over there? He'll give you all the details.” | | This mission is the first in a small series of missions that are all tied together. There are three different ways you can approach this particular mission, and what you decide to do will affect the ones following it. You can help the bandits, help the the stalkers, or take a less active part. The following sections will provide a walkthrough for each scenario.The mission takes place during the night, and if you talk to Knuckles and start the mission during the day, you fast-forward to sometime after midnight, and you'll start the mission outside of the Shevchenko; Zaton can be a very dark place at night, so if you have a suit or helmet with night vision, that is probably going to help alot. If you talk to Knuckles early in the morning, you may start the mission right then, possibly after the sun has started to rise, which can eliminate the need for any artificial lighting. Helping the bandits
If you decide to help the bandits, the mission is quite simple: go to the Shevchenko and eliminate all the stalkers there. You'll have help from Knuckles and three of his friends, so this shouldn't be too difficult. Also, the stalkers at the Shevchenko are unexperienced, with the possible exception of Spartacus, and they carry gear to that effect. There are usually one or two stalkers inside the first room on the ship; the rest, about six in total, are up the stairs. Although the bandits rush forward, staying at the bottom near the stairs can be a good staging area since you can easily strafe to the side and find cover if you need to reload. Once you've dealt with the stalkers, go talk to Knuckles and receive your reward - 1,500 RU and a stash location; if he died during the assault, you should be pointed to one of the other bandits who will give you the reward. You can now pick up the next mission, Transaction, from Sultan. Helping the stalkers
If you wish to help the stalkers, go pick up the mission from Sultan and then head over to Beard and tell him about the bandits' plan. He'll ask you to go through with the raid, saying that he'll tip off the stalkers and setup a plan to give the bandits a "warm welcome". Head on back to Knuckles to start the raid, or if he's already on his way to the Shevchenko follow him and talk to him once you arrive. After you begin the assault, taking down the bandits should be a simple affair - just stay behind them and wait for the right moment. On their way into the ship, they'll be close together and this is an excellent opportunity for some quick bursts, some blasts from a shotgun, or even a grenade or two; also, attacking them at this point will mean that the stalkers are less likely to have any casualties. Even if one or two of the bandits manage to make it any further, they are likely to meet a barrage from the stalkers. Once the bandits have been dealt with, locate and talk to Spartacus to complete the mission and receive your reward; I am not sure if this is semi-random, or perhaps depending on the success of the mission (ie. how many of the stalkers survived), but last time I checked I got ten bandages, two medkits, two antirads and four bottles of vodka. Following the completion of this mission, you can now pick up the next one, Transaction, from Beard (but only if Spartacus survived this mission).Staying neutral
The final option of dealing with this mission is perhaps the easiest, but not necessarily the most satisfying... I don't know. But it means that you pick up the mission from Sultan and then start the raid along with Knuckles. After that, you just sit back and watch the show, attacking neither the stalkers nor the bandits. If the stalkers manage to win the firefight, the mission will be cancelled and no reward will be waiting for you - you can however return to the Skadovsk and talk to Owl who will have a proposition for you - refer to this mission for the details. |
|
|
“I've got a job for you. My boys need to see a trader... you know, business related. It's been hot in the Zone lately, so I thought an extra shooter wouldn't hurt. Make sure the shit goes down nice and smooth. Good. My people will meet you near the ranger station. The coordinates are in your PDA.” | | Before you head off to the Ranger Station, prepare yourself for a firefight. Although you'll have the help of five bandits, you're going up against about ten mercenaries and stalkers, some of them fairly well equipped; the "trader" that Sultan mentions is well armed, wearing an Exoskeleton and possibly also carrying a SPSA-14 shotgun. Also, be real careful about friendly fire - if you accidentally hit one of your friends, they may all turn on you which will obviously be bad for several reasons. Anyways, once you're ready, make your way inside the compund at the Ranger Station.Talk to the leader of the bandits, this will be Knuckles if he survived the last mission, and follow them inside the nearby building where the "trader" and his friends - and a couple of mercenaries - are waiting for you. They'll start to talk about how the bandits are looking for better equipment and the trader has exactly that; the conversation will be interrupted by a number of stalkers who are sneaking up on you, and the mission will update now requiring you to eliminate all witnesses.At this point everyone, except the bandits, will become hostile and a firefight ensues. Since you're pretty close to the "trader" and his mercs, things can go very bad right here - try to make your way either outside or into the nearby room for some cover. You will be joined by the stalkers very soon, and you don't want to get caught in the middle. The back, where you originally met up with the bandits, is usually a good place to hang out. Once you've killed all the mercs and stalkers, go talk to the bandit leader (again, Knuckles if he made it out of the last mission alive), and receive your reward. Before you leave the area, be sure to loot the body of the "trader" - he is carrying a PDA that will come in handy later on. |
| | You can pick up this mission from Sultan if you decided to help out the bandits during The hit. |
|
|
“A stalker squad went into the tunnels to the north of the plant the other day and ran into a mutant lair. They were all so shocked that none of them can even explain what kind of mutants they were, but two of the stalkers didn't make it out of there alive. After that the folks at Yanov got real scared about the whole thing, so they put together a 5,000 reward for anyone who's willing to deal with this lair. It's a dangerous job, so you decide for yourself... Will you do it?” | | This mission sounds pretty straightforward; just go to the tunnel and kill some mutants. Easy, right? Well, perhaps not so much. It really depends on what equipment you have and possibly how lucky you are. The problem is that you are going up against two Burers - if you haven't fought them before, you're in for a treat. While they may not look very intimidating, they do have some nasty tricks up their sleeves: they can drain your energy to the extend where you cannot walk, they can yank your weapon out of your hands, they can hurl objects at you much like a Poltergeist, and finally they have a crushing telekinetic attack that deals alot of damage - and all this from a distance, as long as they can see you. Oh yes, and they can shield themselves from bullets. Sounds like a fun bunch, right? So, a good suit with decent armor and impact values and possibly some endurance recovery is going to help alot, and you may wish to bring some extra medkits and ammunition just in case; a backup weapon may also prove useful since the Burers may pull your weapon out of your hands. While they can be quite annoying and perhaps even difficult to kill from a distance, Burers tend to go down pretty easy if you get in close and stab them with your knife. However, since there are two of them you may have a hard time doing this - you'll either die very easily, or at least need to pop some medkits depending on what armor you're wearing. Try out different strategies and see what works for you.Head off to the tunnel in the far south-eastern side of Jupiter, just north of the Jupiter Plant; you'll find a doorway on the eastern side of the tunnel. Enter and make your way through the rooms - it's pretty much a one-way street so it should be easy to find them. Eventually you'll come to a large room with some train cars inside; this is where the Burers are. You may wish to stick it out here as you can use the small room you're coming from as a safe place - the Burers wont come up there. Take your time dealing with them if needed - a sure way to fail is to try and rush them; this may work for a lone Burer, but two - or even three - can be a very lethal combination. Watch your endurance and health as well. Once they are dead head back to Trapper for your reward. |
| | When you've completed this mission along with Hunting the chimera in Zaton, you may get a transmission from Trapper when you are close to Yanov Station; he says a Chimera has been spotted in the area and would like your help. This leads to the mission Night hunt. |
|
|
“A group of swamp bloodsuckers has been spotted in Fen, behind the cement factory. They seem to be keeping to the swamp for now... but local stalkers want to make sure they stay there forever, if you know what I mean. The price for the whole group is 3000. Will you do it?” | | This mission requires you to eliminate three bloodsuckers at the swamp east of Plavni Anomaly. Killing them shouldn't pose too many problems unless you are attacked by all of them at once; softening them up first with a couple of grenades is a good approach; the mission marker will always point to one of the bloodsuckers, so use that to your advantage. Another possible option is to head up to the roof of the Cement Factory and use a good long-ranged weapon take them out from a distance, which also puts you out of harms way. In this case the mission marker will be off your mini-map - use your crosshair to spot them instead, as it'll turn red when you're aiming at enemies and mutants, including cloaked bloodsuckers. Once they are all dead, return to Trapper for your reward. |
| | Thanks to KilrB for the nice tip about using the Cement Factory. |
|
|
“Thanks for coming... I need a reliable and experienced hunter and you're the best Yanov has to offer. After all that has happened, I can't let the chimera escape again... I'm putting up all my savings for this: 10,000. I want to make sure the job is done right... Fox must be avenged! Great. The hunter who found that bastard saw it just as it got dark. It was headed towards the ventilation complex. Chimeras are nocturnal and territorial, so it was probably going to its hunting grounds... I think that's where you should look for it come nightfall. Then again, it's more active when it's dark... Be careful and good hunting.” | | I haven't been able to track down the mutant during the day, so I'm not sure if it actually has a lair somewhere... so I guess you'll have to do as the mission says, hunt it during the night. As you've dealt with Chimeras before you know that they are pretty fast - and tough - and they deal a good amount of damage with their attacks. They often leap around making them a bit harder to hit and they can close in on you pretty fast as well. You'll encounter the Chimera near the Ventilation Complex; while I often first meet it at the complex, I was surprised by it out in the open last time - this makes it more difficult to kill since you don't have a lot of cover to move around. If you suffer the same fate, your best bet is to strafe alot and try to keep your distance.If you engage it at the Ventilation Complex the story is very different - you can use some of the structures there to move around, preventing the Chimera from having the opportunity to jump straight at you; there is also a fence there which you can use to the same effect. Another option is to climb on top of the two silos; the height of the structure means that you'll be completely safe up there although the Chimera has a habit of hiding behind the large dome meaning that you'll have to leave your safe haven if only for a short while. Finally, you can solve the mystery of The Oasis and use the exit from the Oasis to get on top of the dome where you'll be safe from the Chimera. When the Chimera is dead, return to Trapper to complete the mission and receive your reward. |
| | You'll need to complete Trappers previous missions, along with Hunting the chimera, before this mission becomes available. Thanks to KilrB for his assistance with this mission. |
|
|
“Good day to you, stalker. I'm Uncle Yar... I guess you're tired from the road, eh... Have a bit to eat, since you're here. You chose a good time to show up, too - I need some help. At my age there are things I can't do on my own. Back in the day, though... Easy as pie... The two of us make our way over to Kopachy - it's not far from here. The rest you'll see for yourself when we get there. Cool... We'll be back before you can say "bloodsucker" - hah!” | | When you pick up this mission from Yar you'll automatically go to Kopachy. Now, from this point on things may go slightly different depending on the situation. I believe that if you have recently completed Anomaly research, part 3 the village may be empty. In this case, just follow Yar up to the attic of the nearby house. When you get there, you'll see a number of Mercs approaching. Yar will start firing upon them, so help him take them out. If there actually are zombies at the village, follow Yar and don't start shooting - the zombies aren't going to attack you, at least not at this point. When you get to the attic you can basically sit back and watch the show - the zombies, along with Yar, are very likely to take down the Mercs on their own. Feel free to join in the shooting if you like . The zombies will be hostile once you reach the attic, so dont draw their attention during the firefight, and watch yourself when you leave the village. When all the mercs are dead, Yar will walk down the stairs and tell you to come talk to him. He'll offer an explanation of the whole deal - he was recently caught eavesdropping on some mercs, who were talking about some urgent order and a lab in Pripyat. Yar made a run for it and got away, but knew that the Mercs probably wouldn't settle with that. He made a plan to ambush the mercs but needed some extra help, and so waited for an outsider to come by; he didn't want to involve the Freedom faction as it really wasn't their problem and he didn't want them to become involved. You can leave with Yar and head straight back to Yanov Station or decide to stay; if you're looking for some extra loot and cash, choose the latter as it enables you to loot the dead mercs (and zombies). |
| | The lab that Yar mentions is obviously X8, and the mercs will eventually make it to Pripyat to close a deal there, which can be witnessed during One shot. |
|
|
“Well... I had an old suit that was starting to wear out, so I figured I need a new one. Soon as I thought that, I saw a brand spanking new suit for sale... It had a closed-cycle respiratory module and everything... I counted my money this way that but came up short every time... Then Jack, the seller, said to me, "Don't worry Vano, you can pay me the rest later." I was like, "What a nice guy!" and all that... I sold my old suit, got all my cash and brought it to him. Jack was like, "Well done, Vano, but what about the interest?" I thought, "Yeah, he's right... I need to get the interest to him..." I put together some more cash and took it to him. When I got there he said, "While you were out, more interest built up, Vano." Seems the interest grows so fast I can't catch up... I had to pawn the new suit and my weapons, too... I want to pay him the money I've earned. There's nothing more important than Vano's reputation... But I'm scared. Could you go see Jack instead of me to pay my debt? The only thing is, when you go see him make sure to whip out a powerful gun or something. Show them you're not one to mess with and they'll give you some respect...” | | Vano gives you 5,000 RU to use for his debt. Jack can be found inside a building at the Checkpoint south of Yanov Station. There are different ways you can complete this mission. Obviously, killing Jack will remove the need to pay any debt, so you can keep the 5,000 RU for yourself. The Checkpoint is filled with bandits, though, so this may not exactly be the easiest solution, and it ruins your chance of getting the Diplomat achievement. If you are itching for a fight, you can always go fight the bandits after you pay off the debt. You can also go for the peaceful way out which is simply to deliver the cash to Jack. When you talk to Jack, he'll say the debt is actually 7,000 RU - I guess more interest has been added since Vano last talked to him. However, if you bring a good weapon, you can threaten Jack by showing him your gun - if he is intimidated, he'll lower the debt to match the 5,000 RU you got from Vano. To succesfully threaten him you'll need to have a good weapon in one of your weapon slots in the inventory - a mere AKM-74/2 or Chaser 13 won't cut it - you need something like a SGI-5k or Vintar BC. So, even if you don't have a good enough weapon, you can just pay the 7,000 RU to release Vano of his debt. |
| | If you resolve both this and the Hostage mission peacefully you'll be awarded the Diplomat achievement. |
|
|
If Zulu managed to survive the trip to Pripyat you'll meet him at the caved-in area of the School, fighting off Snorks. Help him out and you'll not only get an apology about his earlier behaviour - when you were discovered by the military after arriving in Pripyat - but once you're back at the Laundromat he will also give you his unique RP-74. | | Another very simple mission - help Zulu fend off the Snorks coming out of the wing (or jumping off the roof) on the other side of the school. You'll have to take an active part in this mission, dealing with the mutants; if you sit back, I believe the stream of Snorks will be endless until either you or Zulu are dead. Once you give him a hand, you should be facing about five Snorks at a time, with about 12-15 in total. This is extremely easy, as long as you keep close to Zulu and the caved-in area - apparently the Snorks wont come up there as long as Zulu is alive; only rarely they get close enough for a sweeping attack, but they never seem to jump at you, making this fight a breeze. Keep fighting them until they stop showing up and you can eventually go talk to Zulu. He'll thank you for the help; at this point you can either quick-travel back to the Laundromat with him, or just meet him there later if you've got other things to do. Once you talk to him there, he'll give you his RP-74. After that he says he's heading for Jupiter but I can't recall ever actually seeing him there afterwards. |
|
|

 Awl
Awl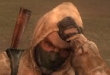


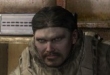


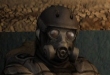


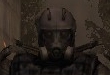
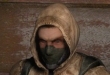

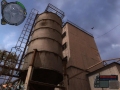


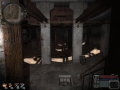

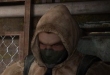


 - @dawnrazor73